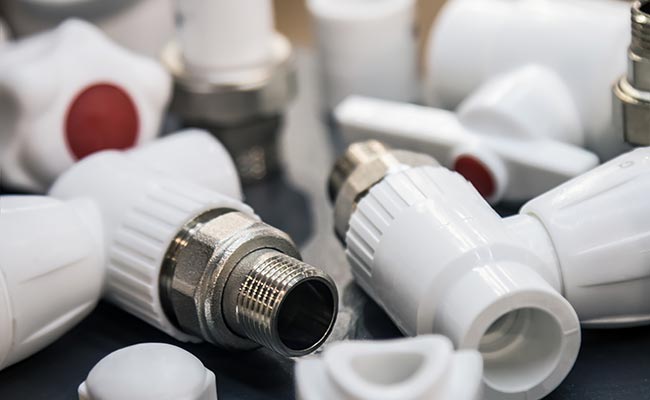
Although PVC is the most common non-metallic pipe in the world, PPR (Polypropylene Random Copolymer) is the standard pipe material in many other parts of the world. The PPR joint is not PVC cement, but is heated by a special fusion tool and basically melted into a whole. If created correctly with the right equipment, the PPR joint will never leak.
Heat the fusion tool and prepare the pipeline
1
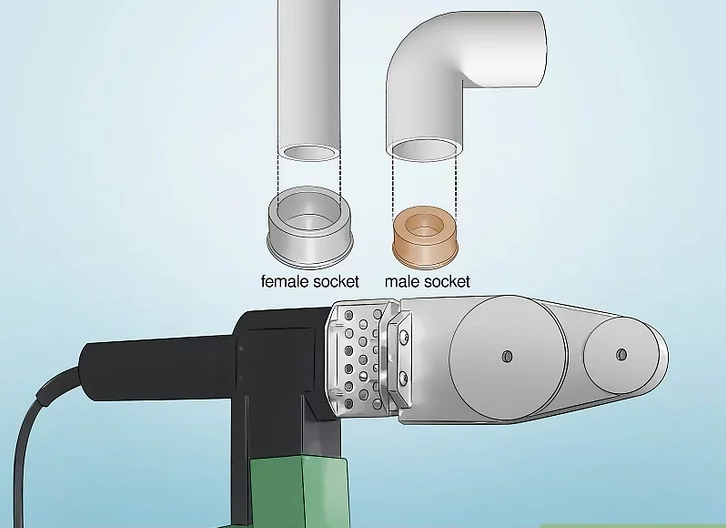
Place a suitable size socket on the fusion tool. Most PPR welding tools come with pairs of male and female sockets of various sizes, which correspond to common PPR pipe diameters. Therefore, if you are using PPR pipe with a diameter of 50 mm (2.0 inches), select the pair of sleeves marked 50 mm.
Hand-held fusion tools can typically handle PPR pipes from 16 to 63 mm (0.63 to 2.48 inches), while bench models can handle pipes of at least 110 mm (4.3 inches).
You can find various models of PPR fusion tools online, with prices ranging from around US$50 to more than US$500.
2
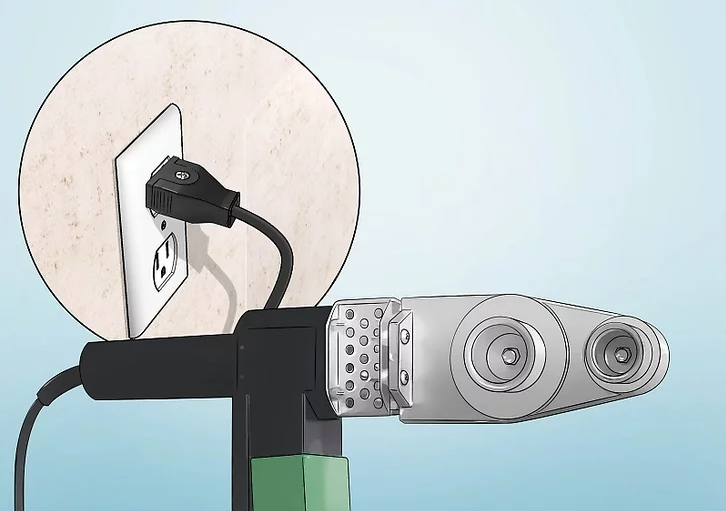
Insert the fusion tool to start heating the socket. Most fusion tools will plug into a standard 110v socket. The tool will start heating immediately, or you may have to turn on the power switch. Models vary, but it may take a few minutes for the tool to heat the socket to the necessary temperature. [3]
Be very careful when using the thermal fusion tool and make sure that everyone in the area knows that it is running and hot. The temperature of the socket exceeds 250 °C (482 °F) and may cause severe burns.
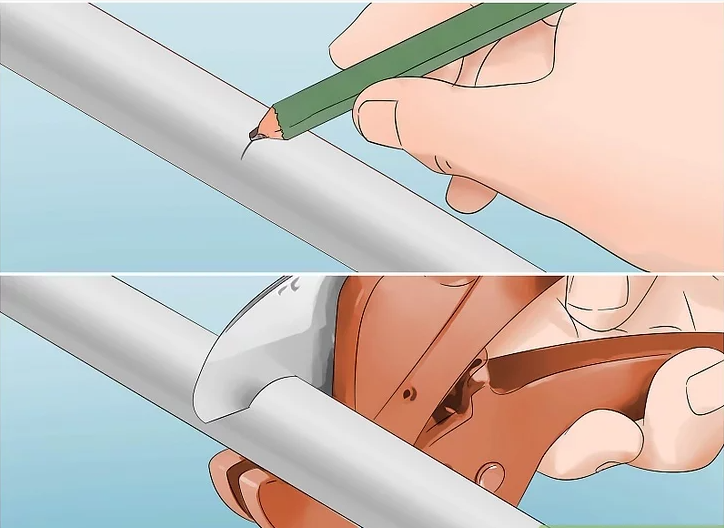
3
Trim the pipe to length with a smooth, clean cut. When the fusion tool is heated, use an effective tool to mark and cut the pipe to the required length to obtain a clean cut perpendicular to the shaft. Many fusion tool sets are equipped with trigger or clamp pipe cutters. When used in accordance with the instructions, these will produce a smooth, uniform cut in the PPR, which is very suitable for fusion welding. [4]
PPR pipes can also be cut with various hand saws or electric saws or wheeled pipe cutters. However, make sure that the cut is as smooth and even as possible, and use fine sandpaper to remove all burrs.
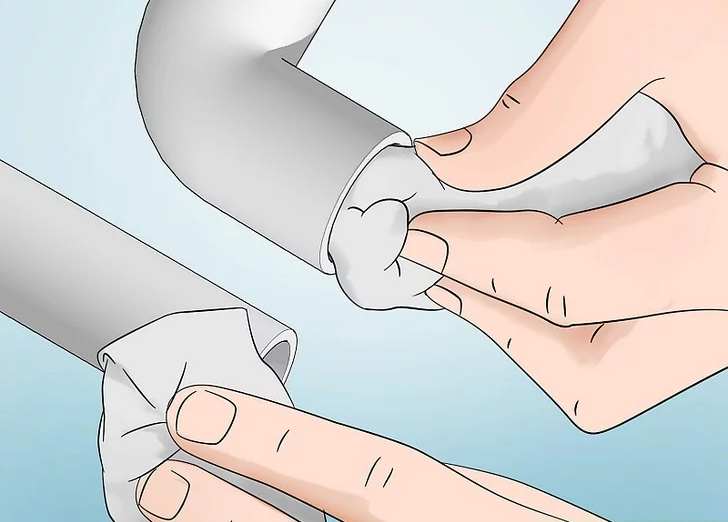
4
Clean the PPR components with a cloth and recommended cleaner. Your fusion tool kit may recommend or even include a specific cleaner for PPR tubing. Follow the instructions to use this cleaner on the outside of the pipe and inside the fittings to be connected. Let the pieces dry for a while. [5]
If you do not know which type of cleaner to use, please contact the manufacturer of the fusion tool.
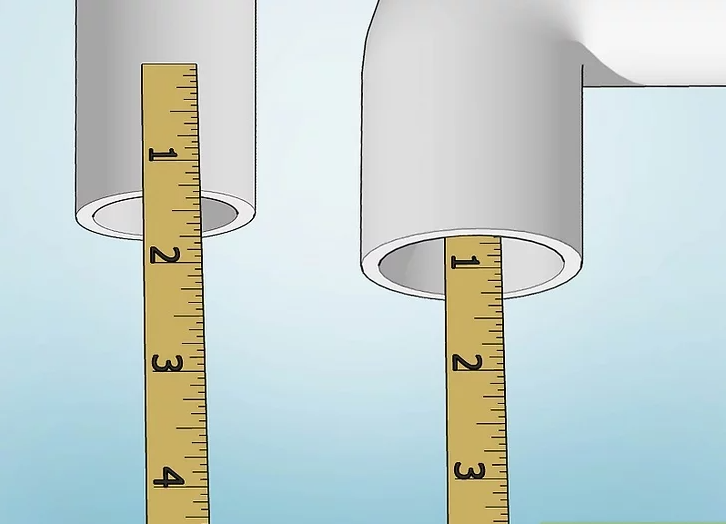
5
Mark the welding depth at the pipe connection end. Your fusion toolset may come with a template for marking the appropriate weld depth on PPR pipes of different diameters. Use a pencil to mark the tube accordingly.
Alternatively, you can insert the tape measure into the fitting you are using (such as a 90-degree elbow fitting) until it hits a small ridge in the fitting. Subtract 1 mm (0.039 inch) from this depth measurement and mark it as the weld depth on the pipe.
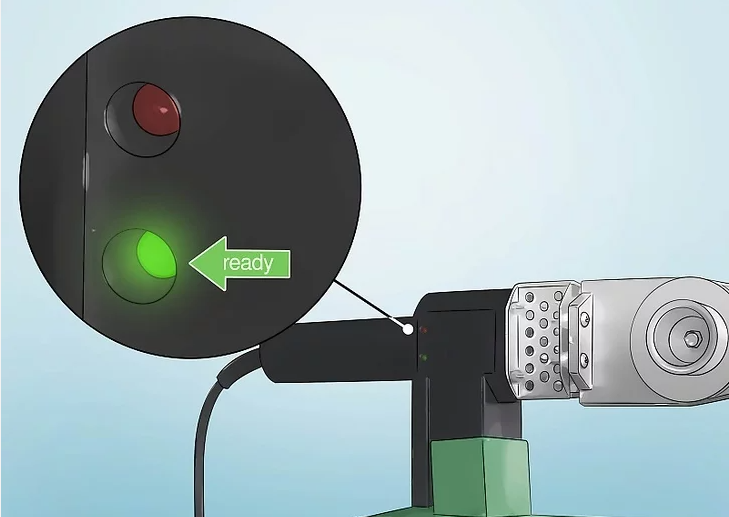
6
Confirm that the fusion tool is fully heated. Many fusion tools have a display that tells you when the tool is heated and ready. The target temperature is usually 260 °C (500 °F).
If your fusion tool does not have a temperature display, you can use a probe or infrared thermometer to read the temperature on the socket.
You can also buy temperature indicator rods (e.g. Tempilstik) at welding supply stores. Choose wood sticks that will melt at 260 °C (500 °F) and touch one to each socket.
Post time: Dec-31-2021