You have glued your valve into the pipeline. Then you realize the handle is facing the wrong way or glue has seized the mechanism. Now you have to cut it out.
To install a true union ball valve, first glue only the end connectors to the pipe. After the glue cures, insert the valve body with its O-rings and hand-tighten the union nuts. This method prevents glue from ruining the valve.
Mistakes during installation are costly. I’ve seen it happen on job sites. A simple mistake can turn a brand new, high-quality valve into scrap plastic. That’s why I always take the time to explain the process to partners like Budi in Indonesia. When his contractor customers understand this simple method, they work faster and avoid expensive errors. The design of a true union valve is meant to make life easier, and a proper installation ensures you get that full benefit.
How does a true union ball valve work?
This valve has more parts than a simple compact valve. You might be afraid to take it apart for installation, fearing you won’t be able to put it back together correctly.
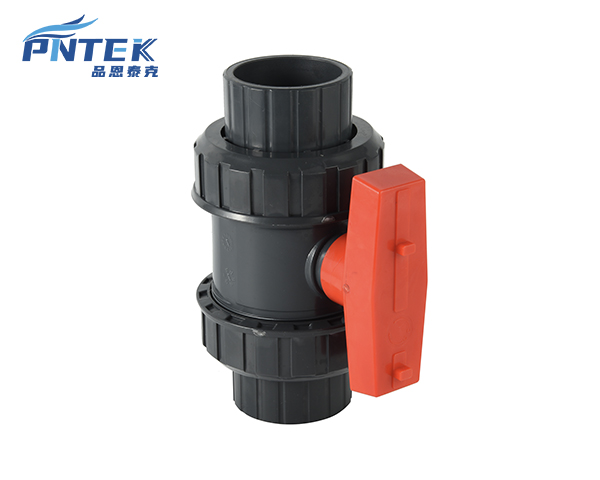
It works with a three-piece design. Two end connectors are attached to the pipe, and two large union nuts squeeze the main valve body between them. O-rings create a perfect, removable seal.

The genius of this design is its simplicity and strength. Once you understand the three main parts, its function becomes very clear. It is a robust system designed for easy maintenance. The entire concept is to allow the “working” part of the valve to be removed without ever touching the pipe.
The Three-Part System
A true union valve is made of three core components that work together.
| Part | Function |
|---|---|
| Central Body | This is the main part. It contains the ball, stem, handle, and a seat on each side. It is the heart of the valve that controls the flow. |
| End Connectors | These are the two pieces that connect to your pipe, either by solvent cement (glue) or threads. Each one has a flange that presses against the central body. |
| Union Nuts | These are the large nuts that slide over the end connectors. They thread onto the central body and provide the force to clamp everything together. |
When you tighten the union nuts, they pull the end connectors tight against the central body. We place high-quality EPDM O-rings in grooves on the central body. The pressure from the nuts compresses these O-rings, creating a reliable, leak-proof seal that can be taken apart and reassembled many times.
What is the right way to install a ball valve?
You have your new true union valve and a can of PVC cement that sets in seconds. One drip of glue in the wrong place could freeze the ball, making the entire valve useless.
The only right way is to install it disassembled. First, glue the end connectors to the pipe. Wait for the cement to cure completely. Then, insert the valve body and hand-tighten the union nuts.
This method is foolproof. It completely removes the risk of getting glue on the ball, seats, or O-rings. I always explain this to Budi because it is the most important detail for his contractor clients to know. Skipping these steps is the number one cause of new valve failure. Taking a few extra minutes to do it right saves hours of work later.
Step-by-Step Solvent Weld Installation
Follow these six steps for a perfect installation every time.
- Dry Fit and Mark. Place the entire valve in the line without glue. Make sure it fits correctly. Use a permanent marker to draw alignment lines on the pipe and the end connectors.
- Disassemble the Valve. Unscrew both union nuts. Gently remove the central body and the two O-rings. Put the body and O-rings in a clean, safe place.
- Prepare and Cement. Follow the cement manufacturer’s instructions. Clean and apply primer to the outside of the pipe and the inside of an end connector.
- Install End Connectors. Apply a full, even coat of cement to the pipe and fitting. Immediately push the end connector onto the pipe with a slight twisting motion until it hits the stop. Make sure your alignment marks line up. Hold it firmly for 30 seconds. Repeat for the other side.
- Cure. This is a critical step. Wait for the cement to cure fully. This can take several hours depending on the temperature and humidity. Do not rush it.
- Reassemble. Once the joints are cured, place the O-rings back on the valve body. Insert the body between the end connectors and hand-tighten the union nuts. Do not use a wrench unless there is a small drip. Hand-tight is usually all you need.
What does true union mean?
You see the terms “union” and “true union” on different products. You wonder if “true” is just a marketing word or if it represents a functional difference that you need to pay for.
“True union” means the valve has a union connection on both ends. This design lets you completely remove the central valve body by simply unscrewing the two nuts, without bending or cutting the pipe.
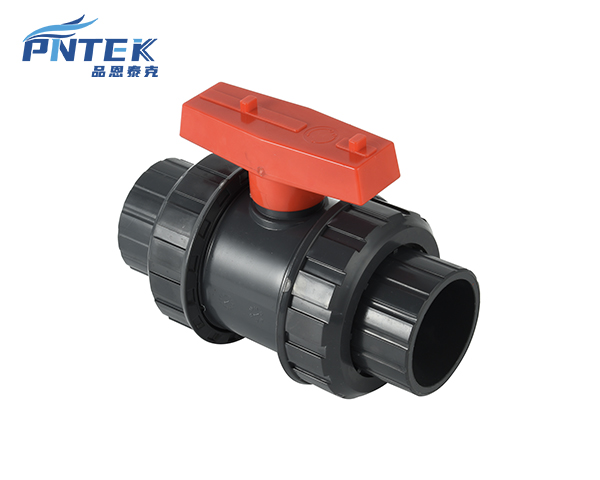
The word “true” is very important here. It describes the key feature and benefit of the valve: superior serviceability. Imagine you have a pump that needs to be replaced. A true union valve before and after the pump allows you to shut the flow, unscrew two nuts, and lift the pump right out. It turns a major plumbing job into a simple mechanical task.
True Union vs. Other Connection Types
The value of a true union design becomes obvious when you compare it to other valve types.
| Valve Type | Removability | Maintenance Effort |
|---|---|---|
| True Union | The central body lifts straight up and out. | Easy. Takes minutes, no stress on pipes. |
| Single Union | Only one side disconnects. The valve must be pivoted or bent out. | Difficult. Stresses other pipe joints and can cause leaks. |
| Compact Valve | One solid piece. Must be cut out of the pipeline. | Very Difficult. Requires cutting, re-piping, and extra fittings. |
While a compact valve is fine for long, straight pipe runs, it is a poor choice near any serviceable equipment. In contrast, a true union valve is the professional standard for any system that may one day require maintenance. That is why we focus on producing world-class true union valves at Pntek.
How do you determine the install direction of a ball valve?
You are rushing to finish a job and quickly glue a valve in place. Later, you worry you might have installed it backward, which could cause system failure under pressure.
Most standard PVC ball valves are bidirectional and can be installed with flow in either direction. You only need to check for a flow arrow printed on the body, although this is rare on ball valves.
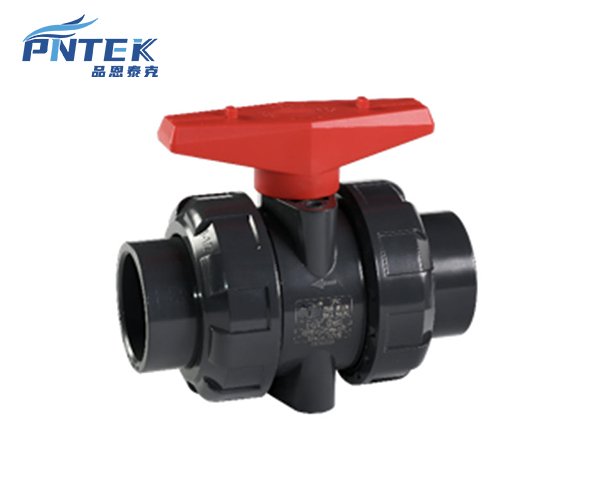
This is a great question that shows attention to detail. For many other types of valves, direction is critical. Forgetting to check can lead to major problems. Fortunately, one of the benefits of a standard ball valve is its simple, symmetrical design.
Are Ball Valves Bidirectional?
Yes, almost all standard ball valves are bidirectional. The valve works by turning a solid ball with a hole through it. When the valve is closed, the solid face of the ball blocks the flow. Since the ball and its seats are symmetrical, it does not matter which side the pressure is on. It will seal equally well from either direction. This simplifies installation and removes a common point of error for contractors. All of our standard Pntek true union ball valves are fully bidirectional.
When Direction Matters
While standard ball valves are bidirectional, you should always give the valve body a quick check for a flow arrow. An arrow indicates the valve MUST be installed with the flow following the arrow. This is not common for ball valves, but it is the rule for other types:
- Check Valves: These are one-way valves by definition and will always have a large, clear arrow on the body.
- Globe Valves: These are designed for throttling and must be installed in a specific direction to work properly.
- Specialty Ball Valves: In rare cases, a vented ball valve (used for gasses like chlorine) has a tiny vent hole that must face the upstream side. These are not used for typical water applications.
My advice is simple: always look for an arrow. If there is no arrow, you can install it any way you want.
Conclusion
Installing a true union valve correctly is easy. By cementing the ends first, you protect the valve and unlock its full benefit of simple, fast maintenance for years to come.
Post time: Sep-17-2025


